
How to Get Great Photographs of Butterflies

RED ADMIRAL BUTTERFLY WITH PINK AND MULTY COLORED FLOWERS. SHOT AT F6.3; 1/1250TH SEC; ISO 400. CAMERA: NIKON D500 and NIKON200-500MM LENS. NO FLASH IMAGE: ©ROBERT WALLACE
ROBERT WALLACE IS A NATURE AND WILDLIFE PHOTOGRAPHER AND AN IMPORTANT MEMBER OF OUR DESTINATION: WILDLIFE TEAM
By Robert Wallace
Capturing the Full Beauty of a Butterfly With Your Camera is a Real Art
Hi everyone!
My wife and I made a big move recently - all the way across the country. Well, I started looking through what I had hauled all those miles and came across… butterflies. I started laughing out loud remembering some of the situations I found myself in trying to get them. Photographing butterflies is not easy - but it is fun and worth it, so, I thought I’d share some of my favorite shots and what I learned trying to get them, with you. This article is about:
1) Making sure that your butterfly stands out as your main subject, and
2) How to visualize the background or find elements close to your subject that will draw the viewers eyes in. But first:
MALACHITE BUTTERFLY SHOT AT F6.3; 1/400TH SEC; ISO 320. CAMERA: NIKON D500 AND TAMRON 150-600MM G2 LENS. FLASH USED IMAGE: ©ROBERT WALLACE
What is the Best Time to Photograph Butterflies?
SPICEBUSH SWALLOWTAIL BUTTERFLY. SHOT AT F/7.1; 1/400TH SEC AND ISO 560. CAMERA: NIKON D500 AND LENS TAMRIN 150-600MM G2 SERIES NO FLASH AND NO FILTER. IMAGE: ©ROBERT WALLACE
The absolute best time for photographing butterflies in the field is early morning. And I do mean early. Think: before the dew evaporates.
Butterflies are at their most docile state as they wait for their wings to dry. If you are lucky enough to live near a field or meadow, you could be well rewarded for the sacrifice of not sleeping in. Many of us do not have that geographic luxury, and many public gardens do not open until well after the butterflies are fluttering around. This, of course, takes you back to the beginning of the article and the patience required to wait for one to land near you.
I have always wondered why it is that butterflies have to wait to fly in the mornings when they seem to have no problem with flight in the middle of a rainy day. Yep. Nothing like sitting around in the rain waiting for that shot of a butterfly. Needless to say, I DO NOT do this in the late fall, winter or early spring when it’s cold, too. I may have lived in New York City for six years, but I still have my limits.
MONARCH BUTTERFLY SHOT AT F/5.6; 1/640tTH SEC; AND ISO 3600. CAMERA NIKON D500 and NIKON 200-500MM LENS. NO FLASH IMAGE: ©ROBERT WALLACE
First Step: Think Out of the Box!
The art of butterfly photography often falls into the realms of either close-up or macro shots, but it doesn’t have to stay there. While either one, when executed correctly, will produce amazingly beautiful photographs, I want to help you think outside the box, too.
I’d like to introduce you to portrait and environmental portrait styles for photographing butterflies. Later I’ll talk about macro photography. also
The Equipment I Use For My Butterfly Photography
There are many techniques and equipment that can be used to capture the moment, and I have used most of them at some point in time. Presently, my go-to equipment for portrait or environmental butterfly photography is the Tamron 150-600mm G2 series lens, the Sigma 100mm and 150mm macro lens, Nikon D500 and D810 cameras and a Flashpoint 360-watt bare bulb on shoe speed light flash, a set of auto extension tubes, tripod, shutter release cord, and a polarizing or neutral density filter.
What is the Difference Between Portrait & Environmental Photography?
ZEBRA SWALLOWTAIL BUTTERFLY SHOT AT F/7.1; 1/320TH SEC; ISO 125. CAMERA CANON D500 and TAMRON 150-600MM G2 LENS. NO FLASH IMAGE: ©ROBERT WLLACE
Before we begin, the question many people ask me is: What is the difference between portrait and environmental portrait photography? In a nutshell: It’s all about the background.
Standard portrait photography is photographing your subject with as much of the background out of focus as possible.
The goal with an environmental portrait is to have as much of the scene in focus as possible.
How much of the image’s background is out of focus will depend on the distance between the subject and the background (elements) and what aperture (f1/4, 1.8, 2.8, 4, 5.6, etc.) you set. If you shoot at the same shutter speed and keep the camera at the same distance from your subject a fast aperture of f/2.8 will produce a blurrier background than having your camera set at f/11. You will also get better background blur with a full-frame camera rather than a crop-sensor camera.
Choosing Background Colors for Your Butterfly
SPICEBUSH SWALLOWTAIL BUTTERFLY SHOT AT F/7.1; 1/400TH SEC AND ISO 640. CAMERA: NIKON D500, LENS TAMRIN 150-600MM G2 SERIES NO FLASH. NO FILTER. IMAGE: ©ROBERT WALLACE
Photography is like any other artistic medium: What moves me in my pictures may not touch you and vice-versa. Art in any form is subjective and perfect technical execution isn’t always the means to a perfect result.

SHOT AT F/7.1; 1/1000TH SEC; & ISO 450. CAMERA: NIKON D500. LENS: NIKON 200-500MM. NO FLASH OR FILTER IMAGE: ©ROBERT WALLACE
Of course, at a minimum, we still want our subject's eyes in sharp focus, but is that all it takes to move us with an image?
One of the greatest stimulators of human emotion is color, even in infants. Especially bright colors. Trying to frame your subject with bright background colors works for both styles of portraiture photography.
So, what do you think would be the most effective, background colors:
A). Completely different from your subjects’ tones or
B). Similar colors but different shading?
Your preference or mine is an area where “art is subjective” comes into play. You’ll see that the majority of my butterfly images will have either “like” colors or “lines” to draw the viewer in (more about the "lines" later).
The Lines (and Frames)
are Drawn in Butterfly Photography
ZEBRA LONG WING BUTTERFLY SHOT AT F6.3; 1/640TH SEC; ISO 2000; CAMERA NIKON D750 and LENS SIGMA 150-600MM CONTEMPORARY. NO FLASH IMAGE: ©ROBERT WALLACE
“Lines” are another composition element that can draw a viewer’s eye to your subject. If I’m not able to find a position that will give me the right background color, then I look for my “lines.” For example, The stem or leaves of a plant may create lines that point to one area of the scene; or might form a natural “frame” for my butterfly subject. When I find something that could work, I check it through my camera lens (zooming in and out) to see if it creates what my mind sees.
DORIS LONG WING BUTTERFLY SHOT AT F/8; 1/800TH SEC; ISO 1600. CAMERA NIKON D500 and TAMRON 150-600MMG2 LENS. NO FLASH IMAGE: ©ROBERT WALLACE
Once I’ve got my background and / or “lines,” it’s a waiting game for the butterfly to appear. The set-up for this specific shot can be a lengthy process, so I chose a garden location, where my odds for getting that shot sooner rather than later are usually best. On the flip side, my eyes are always peeled for a butterfly (or any flying insect) to land on something interesting, when it does, I try for that shot as quickly as possible.
Aside from plants, other elements that create an exciting photograph are ones that have similar shapes and contours to your subject. Of course, finding them is easier said than done when you are in the field. Getting the desired shot takes luck, timing, and quick reaction time.
MONARCH BUTTERFLY SHOT AT F/6.3; 1/200TH SEC; AND ISO 450. CAMERA: NIKON D7100 and NIKON 200-500mm LENS WITH FLASH IMAGE: ©ROBERT WALLACE
Preparing your settings set in advance for the “look” you want is essential. Always decide in advance how much of the subject you want in focus and how much of the foreground and background you want out of focus. Calculate your ideal range to achieve the desired effect – then take some practice shots until you get what you want.
Changing Light Means Changing Your Settings
This process can be tricky in the field because the light is always changing. My personal solution is to set my shutter speed (min 1/500th of second without flash) at a fast enough speed to freeze the action (a breeze could ruin a shot), then set my aperture for depth-of-field (usually between f/8 to f/16) and set my ISO to auto.
Most cameras have auto ISO setting in their menu with an option to choose the max ISO that you will allow the camera to reach if needed. This way you are set for the “look” via shutter and aperture and will enable the camera to adjust ISO depending on the lighting. You might even also consider bracketing your shots as insurance for getting one with the right light. This works best if your camera can shoot at least 7 frames per second since all insects in the wild seemed to be on the move.
What is the Difference Between
“Close-up” and “Macro” Images?

OWL OR OWL’S EYES BUTTERFLY CLOSE UP SHOT AT F/8; 1/400TH SEC; ISO 2200. CAMERA: NIKON D500 and TAMRON 150-600MM G2 SERIES LENS. NO FLASH. IMAGE: ©ROBERT WALLACE
The lines between macro and close-up photography get blurred and are confusing for many photographers. While they make look very similar, there is a difference.

MONARCH BUTTERFLY "1ST TOP AWARD" SHOT AT F2.8; 1/13TH SEC; ISO 100. CAMERA: CANON 20D and CANON 60MM MACRO LENS. FLASH USED. CLOSE UP IMAGE: ©ROBERT WALLACE
Macro refers to life-size reproduction on film (or sensor) which is a ratio aspect of 1:1. This is achieved by using macro lenses that produce a 1:1 aspect ratio or using a set of extension tubes on non-macro lenses. There is also microphotography (some call this extreme macro) which brings you into the realm of 2:1 and greater often achieved by either using extension tubes on macro lenses or attaching a camera to a microscope
Close-up photography, on the other hand, is an image that is short of the 1:1 ratio (such as 1:2, 1:3, 1:4 ratios)
Macro and microphotography is a technique that not only requires specialized equipment, it also requires more patience. In fact, macro and micro photography are better suited to controlled studio work instead of fieldwork. When you are focusing on a subject that will produce a tight highly detailed 1:1 image in the field, the slightest breeze will blur your shot. You will also need to have a very steady tripod that will not vibrate in a breeze. You’ll want to use the mirror lock-up setting in your camera, a shutter release cord and (depending on how close you are to the subject) most likely a flash.
Despite how more technical and difficult this is, when you get that shot, it really is rewarding. You just have to be patient, learning and discovering what works for you and honing your technique.
ZEBRA LONG WING BUTTERFLY SHOT AT F6.3; 1/500TH SEC; ISO 2000; CAMERA NIKON D750 and LENS SIGMA 150-600MM CONTEMPORARY. NO FLASH IMAGE: ©ROBERT WALLACE
What if I Am More Comfortable with Auto Focus?
One other thing I would like to point out. If you are relying heavily on autofocus (or that is all you want to use), you may want to stay in the area of close-up instead of going into macro mode. Good macro lenses will autofocus really close, but they can struggle to maintain that focus if there is any kind of movement. It can also be difficult to focus or keep the focus on the eyes so you may have to go to manual focusing. Just a friendly heads-up.
What About Flash?
Near the beginning of the article, I mentioned the Flashpoint bare bulb speed flash. I often use this for insect photography.
Using any flash will give you even more control over how the scene looks. Depending on the lighting, you may have to go with a slower shutter speed if you want your scene (background) to be brighter. Of course, this could make it harder to get a sharp photograph unless you use a flash to freeze the subject.
GREEN BANDED BUTTERFLY. NIKON D500, TAMARON 150-600MM G2 LENS, FLASHPOINT BARE BULB SPEED FLASH, APERTURE F/8, SHUTTERSPEED 1/1800TH OF A SECOND AND ISO 2000. HAND HELD IMAGE: ROBERT WALLACE
My Favorite Tips for Flash Photography
Flash is one of those things that takes time and practice. I use my flash manually (as well as complete manual control of my camera) because I want to control the amount of light it produces so as not to blow out any highlights on the plants or butterflies.
I might even have to attach a polarizing or 1 or 2 stop neutral density filter to help with the highlights within the scene. I also prefer the bare bulb design with a soft white diffuser attached. This design tends to “wrap” the light around your subject, creating soft to no shadows.
I’m not saying that you need to run out and buy flash equipment like mine. Not at all. Any hot shoe flash that allows manual control will do. There are plenty of diffusers out there that can produce that nice soft round light on the cheap and your flash doesn’t have to be a speed flash either.
What is a Speed Flash

NOPE, THIS IS NOT A BUTTERFLY. BUT, THIS JUMPING SPIDER WAS TAKEN WITH SPEED FLASH. IMAGE: ©ROBERT WALLACE NIKON D7100 TOKINA 100MM MACRO LENS, NIKON SB700 SPEED FLASH, APERTURE OF F/78, SHUTTER SPEED OF 1/160TH OF A SECOND AND ISO 100 - SHOT WAS HANDHELD.
Speed flashes are made so that you can use a faster shutter speed (if your camera allows) than the camera’s normal shutter speed sync. The top flash sync speed for most camera’s sits around 1/200th of a second but with a speed flash (depending on flash) you may be able to photograph at whatever your camera’s fastest shutter speed is. This is how you get photos of perfect water drops suspended above the water line or Hummingbird wings perfectly frozen and sharply focused.
I wish there were a perfect set of settings I could give you for using a flash, but only you can figure that out. Your setting (environmentally speaking) will be different from mine or anyone else’s, as will be your own personal style or vision. What fun would the discovery of wildlife photography (or photography in general) be if everything was as easy as aim, focus, and shoot!
Well, That’s All I Have For Now.
I sure hope that this gives you some ideas for your next outing. Plus, if you have any thoughts or techniques that you like to use to feel free to share in the comments. The great thing about this medium is the ability to continually learn and develop as an artist, no matter how long you have had a camera in your hands. Robert


FOLLOW US
MORE by
Robert Wallace
Photographing Black Bear in the Rain
Cades Cove, Tennessee
Just Me and an Alligator One Day on the Water
Geo. L. Smith State Park, Georgia
In A State Not So Far, Far Away. Adventure on Florida’s Nature Coast

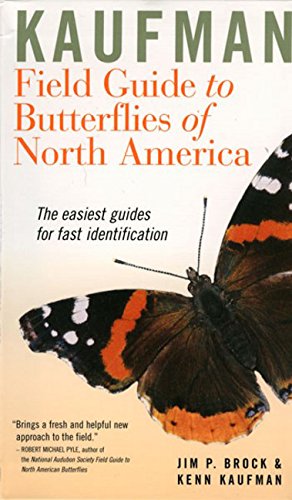

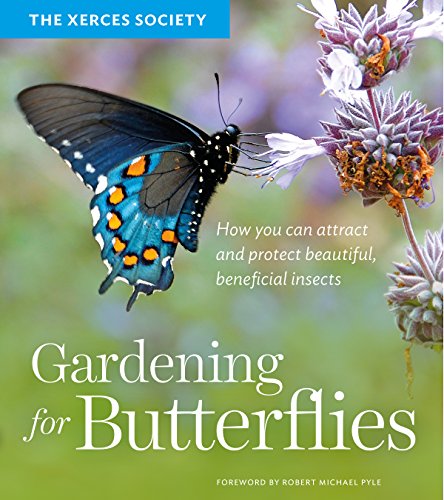
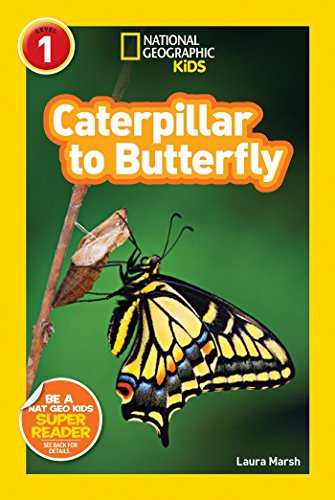
Teach Kids About Butterflies


Quisque iaculis facilisis lacinia. Mauris euismod pellentesque tellus sit amet mollis.